Input Files
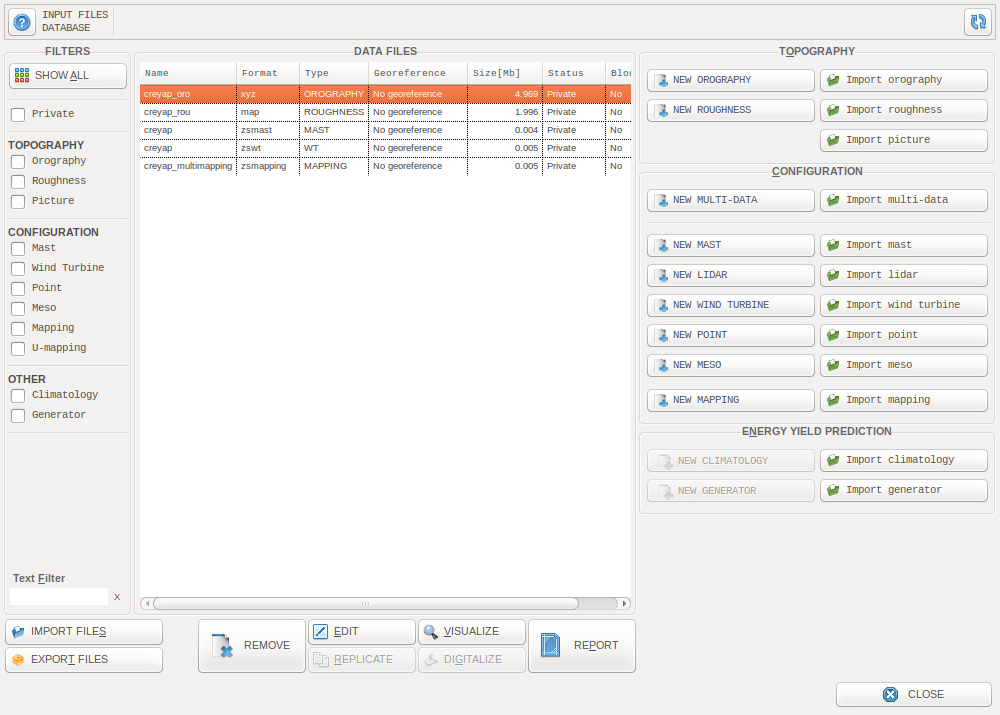
The Input Files window
The Input Files window allows managing with files that will define the project characteristics.
Interface Overview

|
Import one or several files (cf. Bulk Import/Export) |

|
Export one or several files (cf. Bulk Import/Export) |
|
Remove the selected file(s) from database |

|
Edit the selected file |
|
Create a duplicate of the selected file |

|
Visualize the selected file (cf. Visualizations) |
|
Make a report for the selected file (cf. Reports) |
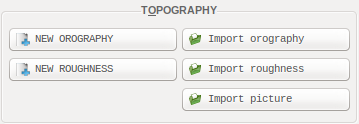
Topography files
Orography
The orography data needed for CFD projects can be loaded in two formats: .xyz and .map.
In .xyz files, each line corresponds to a different point of the map, for which an elevation will be defined. For each line ZephyCFD needs the following information, separated with whitespace :
- X-Coordinate, in meter
- Y-Coordinate, in meter
- Terrain Elevation, in meter
The .map format is the standard WAsP vector format for the orography. This is a format widely used in the industry.
It is possible to define simple-case orography files directly in ZephyTOOLS: By clicking on the NEW OROGRAPHY button, the user can define simple and double gaussian hills.
Roughness
The roughness data needed for CFD projects can be loaded in two formats: .xyr and .map.
In .xyr files, each line corresponds to a different point of the map, for which a roughness length will be defined. For each line ZephyCFD needs the following information, separated with whitespace :
- X-Coordinate, in meter
- Y-Coordinate, in meter
- Roughness length, in meter
The .map format is the standard WAsP vector format for the roughness. This is a format widely used in the industry.
It is possible to define simple-case roughness files directly in ZephyTOOLS: By clicking on the NEW ROUGHNESS button, the user can define fields with a homogeneous roughness length having a circular zone in the middle with a different homogeneous roughness length.
Picture
It is possible to load georeferenced pictures in order to use them as background in the maps and iso-heights plots.
Georeferenced pictures are “.png” picture files that have a “world file” associated to them. A world file is a text file with the extension of “.pngw”, “.pgw”, or “.wld”. It contains the georeference information.
It is possible to generate such files using QGIS which is a free open-source software:
How to georeference existing image files (satellite imagery/scanned maps) with QGIS
Note
The “Georeferencer” plugin needs to be installed in QGIS. select Manage and Install Plugins to install it.
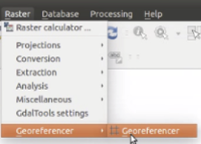
Open QGIS software and click on Raster option. Open the Georeferencer plugin.
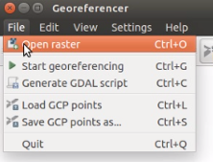
Import your image raster file in Georeferencer window and set the Coordinate Reference System.
Click on the Transformation settings and specify the required settings. Enable “Load in QGIS when done” and click on the OK button:

Click on the “Play” button in the toolbar to start georeferencing:
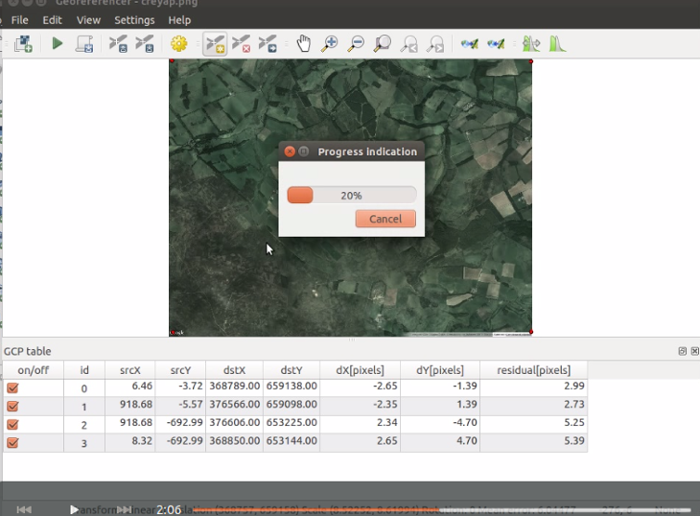
In QGIS main window, you can now see the georeferenced image.
How to generate georeferenced satellite images directly in QGIS
Note
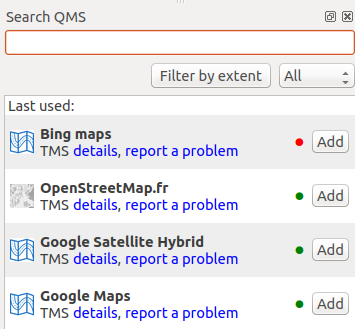
The “QuickMapServices” (QMS) plugin needs to be installed in QGIS. select Manage and Install Plugins to install it.
Access and search for maps in top menu -> Web -> QuickMapServices. Alternately, you can add QMS to your toolbar by right-clicking it -> Panels -> Search QMS.
QMS allows to search many different online maps (OpenStreetMaps / BingMaps / GoogleMaps etc.), and remembers the last ones you used:
Zoom to the area you want to save, then go to top top menu -> Project -> Save as image.
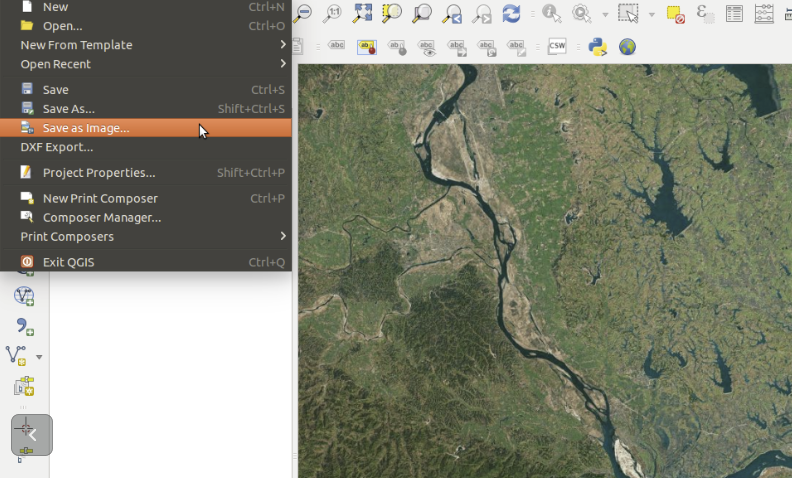
A world file with “.pgw” extension will be generated in the same path.
Configuration files
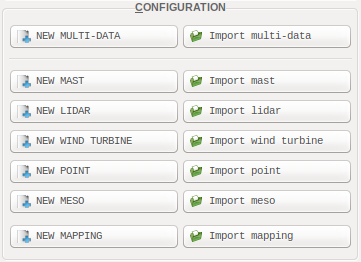
Configuration files are meant to provide ZephyTOOLS with some general information: Locations, heights… They are just simple text files with their content formatted in a specific way. It is possible to create new ones by using any text editor, or directly inside ZephyTOOLS. Inside ZephyTOOLS the user will have the choice between a “standard mode” and a “text mode” when defining a new configuration file:

New mapping file window, standard mode:
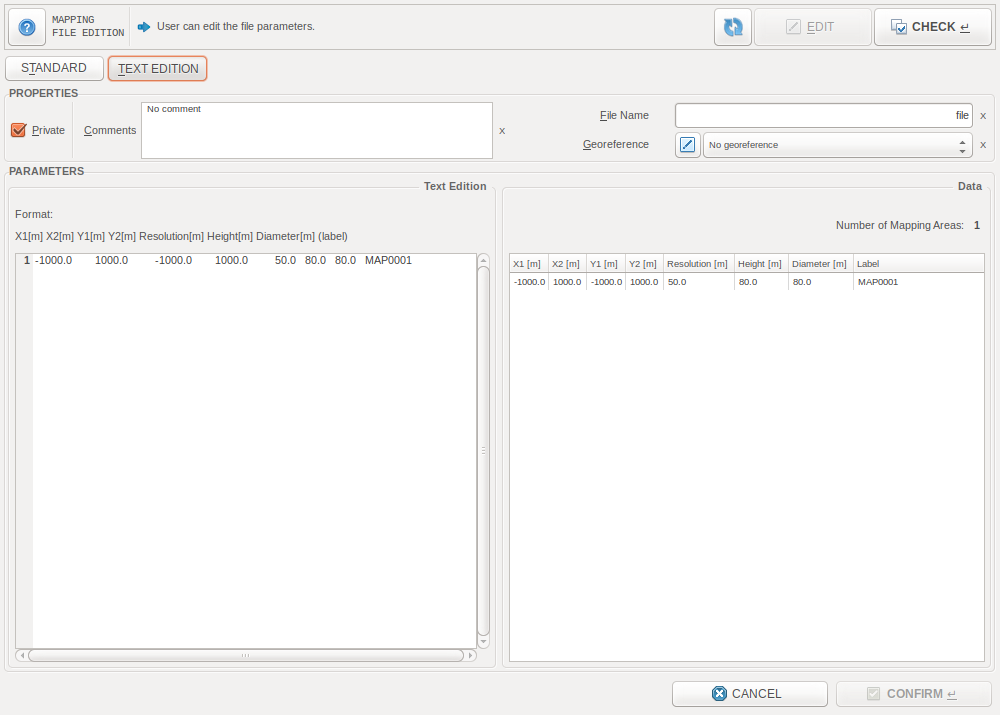
New mapping file window, text mode:
Here are listed the different existing configuration file types:
Masts
In ZephyCFD, the met masts locations are inputed with text files denoted by their “.zsmast” extension. Each line in it corresponds to a different mast, for which a mast entity will be defined. For each mast ZephyCFD needs the following information, separated with whitespace :
- X and Y : The mast coordinates
- Label: The mast name. If omitted, defaults to MASTXXXX, numbered in order
Lidars
Note
In ZephyCFD, the lidar entities are different from the met masts entities mostly only by name. Stay tuned for our upcoming module dedicated to CFD lidar correction!
In ZephyCFD, the lidars locations are inputed with text files denoted by their “.zslidar” extension. Each line in it corresponds to a different lidar, for which a lidar entity will be defined. For each lidar ZephyCFD needs the following information, separated with whitespace :
- X and Y : The lidar coordinates, in meters
- Angle: The lidar scanning angle, in degrees
- Label: The lidar name. If omitted, defaults to LIDARXXXX, numbered in order
Wind turbines
In ZephyCFD, the wind turbines locations are inputed with text files denoted by their “.zswt” extension. Each line in it corresponds to a different wind turbine, for which a wind turbine entity will be defined. For each wind turbine ZephyCFD needs the following information, separated with whitespace :
- X and Y : The turbine coordinates
- Label: The turbine name. If omitted, defaults to WTXXXX, numbered in order
- Group: A group name. This will allow to associate .wtg files to the wind turbines by group. If omitted, all turbines are put into one same group named “group”.
Result Points
In ZephyCFD, a “point” entity defines an additional single result point in the domain whose results will be saved. A point file is denoted by its “.zspoint” extension. Each line in it corresponds to a different result point, for which a point entity will be defined. For each result point ZephyCFD needs the following information, separated with whitespace :
- X and Y : The point coordinates, in meters
- Height: The point height above ground, in meters
- Label: The point name. If omitted, defaults to POINTXXXX, numbered in order
Mesoscale points
In ZephyCFD, a “meso” entity defines a point for which wind data from a mesoscale model will be downscaled. A mesoscale point file is denoted by its “.zsmeso” extension. Each line in it corresponds to a different mesoscale point, for which a meso entity will be defined. For each mesoscale point ZephyCFD needs the following information, separated with whitespace :
- X and Y : The point coordinates, in meters
- Height: The point height above ground, in meters
- Mesoscale resolution: the mesoscale model resolution, in meters
- Resolution: the resolution, in meters
- Label: The point name. If omitted, defaults to MESOXXXX, numbered in order
Mappings
In ZephyCFD a “mapping” is what defines an area for which it will be possible to:
- Visualize Iso-heights results
- Export Wind Resource Grids (.wrg files)
- Export Iso-heights results, either as georeferenced pictures or .xyz files
Note
For each CFD project, in addition to the mappings there is a default circular area at 80m height allowing to visualize and export Iso-heights results.
A mapping file is denoted by its “.zsmapping” extension. Each line in it corresponds to a different mapping, for which a 2D result grid will be defined. For each area ZephyCFD needs the following information, separated with whitespace :
- X1, X2, Y1, Y2: The mapping corners coordinates, in meters
- Resolution: The resolution of the result grid, in meters
- Height: The height of the result grid, in meters
- Diameter: The rotor diameter to use when calculating wind shear (wind speeds at +D/2 and -D/2 will be considered)
- Label: The mapping name
Note
We recommend using a resolution of 20-50m for your mappings, but it also depends on the project size: On big sites, a resolution too fine may result in too many result points and long processing times.
Multi-data
ZephyTOOLS offers the possibility to define several input files into one, with the “multi-data” format. Multi-data files are denoted by their “.zsmulti” extension.
The format consists in defining one entity per line, with the type of the entity being the first information on the line. Entity type identifiers are as follow:
- Masts:
mast - Wind turbines:
wt - Points:
point - Mesoscale points:
meso - Mappings:
mapping
the other values on the line, separated by some whitespace, will follow the usual format corresponding to the entity’s specific configuration file.
It is also possible to include Topography files, by specifying a file path (relative or absolute) after the relevant identifier:
- Orography:
oro - Roughness:
rou
Here is an example of a correct .zsmulti file content:
#Ignored lines
#georef*OSGB 1936|British National Grid
#comments
mast    372854.0        656334.0        M49
mast    372700.0        656790.0        M50
mast    373488.0        656091.0        M51
wt      372405.0        656834.0        T1      group
wt      372624.0        656961.0        T2      group
wt      372941.0        656876.0        T3      group
wt      373260.0        656842.0        T4      group
wt      373433.0        657020.0        T5      group
point   372854.0        656334.0        50.0    M49_A50
point   372854.0        656334.0        40.0    M49_A40
point   372700.0        656790.0        50.0    M50_A50
point   372700.0        656790.0        40.0    M50_A40
point   373488.0        656091.0        50.0    M51_A50
point   373488.0        656091.0        40.0    M51_A40
meso    373115.0        656129.0        150.0   3000.0  200.0   MESOA150
meso    373115.0        656129.0        350.0   3000.0  200.0   MESOA350
meso    373115.0        656129.0        150.0   5000.0  200.0   MESOB150
meso    373115.0        656129.0        350.0   5000.0  200.0   MESOB350
mapping 372000.0        374000.0        655000.0        657500.0        25.0    47.0    30.0    MAPhub
mapping 372000.0        374000.0        655000.0        657500.0        25.0    40.0    30.0    MAP40
mapping 372500.0        373500.0        655500.0        657000.0        20.0    50.0    62.0    MAP50
oro     creyap_oro.xyz
rou     creyap_rou.map
climato creyap_M49_50.zsvd
climato extra_climato/creyap_M49_40_periodA.zsvd
climato extra_climato/creyap_M49_50_periodA.zsvd
climato extra_climato/creyap_M50_40_periodA.zsvd
climato extra_climato/creyap_M50_50_periodA.zsvd
climato extra_climato/creyap_M51_40_periodA.zsvd
climato extra_climato/creyap_M51_50_periodA.zsvd
During importation, the .zsmulti file will be converted into the corresponding several configuration/topography files, which will appear in the database.
Yield Assessment files
Climatology
In ZephyTOOLS, a “climatology” is some wind data associated to a point in the CFD domain. This data is meant to be extrapolated to the rest of the domain, using CFD results.
Currently there are two possible wind data file formats for ZephyCFD:
.tab frequency matrix file
tab files are text files which originated with the WAsP software. Their syntax is as follow:
- Line 1: Comments
- Line 2: Latitude, Longitude, Height
- Line 3: Number of direction sectors, Wind speed scale factor, Direction offset
- Line 4: Sectorized frequencies, all speeds included.
- Line 5 and onwards: Sectorized frequencies, speed-bin by speed-bin. The first value of each line gives the upper limit of the wind speed bin. The other values give either numbers of occurences, or frequencies in per mille of the corresponding sector frequency.
Values on a same line are always separated by whitespace.
.zsvd/.zsvds time series file
zsvd files are text files specific to ZephyCFD and should comply to the following syntax:
- Line 1: Comments
- Line 2: X-coordinate, Y-coordinate, Height
- Line 3: Georeference
- Line 4 and onwards: Measurements, time step by time step.
- .zsvd: Wind Speed Column and Wind Direction Column
- .zsvds: Wind Speed Column, Wind Direction Column, and Standard Deviation Column
Values on a same line are always separated by whitespace.
Note
Timestamps can be included as an optional last column. If they are, they will be in the exported result series as well.
Note
In ZephyCFD, when using a .zsvds file, the Extrapolation process calculates the reference Turbulence Intensity (TI) matrix and use it to extrapolate the measured TI along with speed and direction. This is especially useful for Site Suitability studies.
Generator
The power curve data needed by ZephyCFD for yield assessments can be loaded in standard .wtg files.
Note
Only the standard xml-like wtg files are supported, not the binary ones
Bulk Import/Export
It is possible to select several data files by holding the Ctrl Control Key. You can then export them all at once by clicking on the EXPORT FILES button. A “files database” file will be created (.zsfdb file).
To import a bulk of files, Click on IMPORT FILES and select a .zsfdb file.
Merge orography files
If you have two orography files which you would like to combine (for example one srtm file and one on-site measured file), you can do so by selecting them both, then right-click->”Orography Merge”.
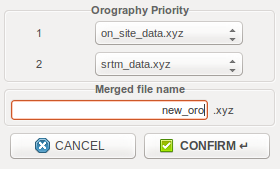
You will be prompted to define which file is the main one, and which file is backup. The newly combined file will appear in the database under the name you have chosen.